
Contents
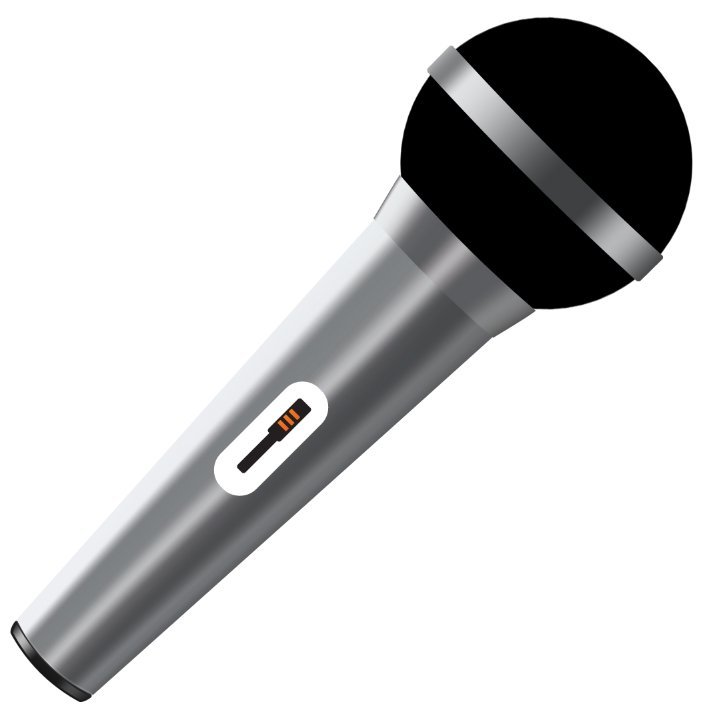
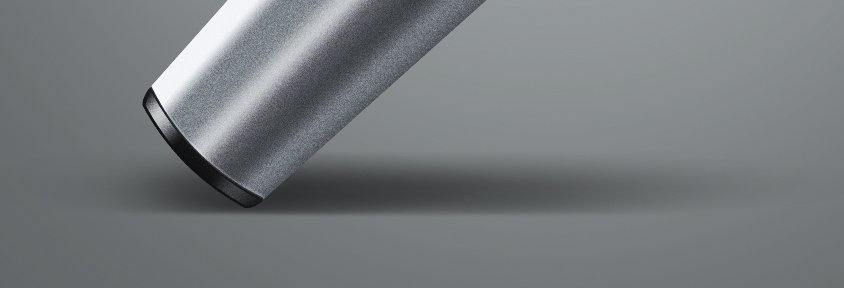
In today’s tutorial we will be looking at how to create an illustration of a Microphone in Adobe Photoshop and Illustrator. This step by step tutorial will teach you how to create the image below in as few steps as possible, going over blending modes, shape layering and many advanced techniques that you will learn throughout the tutorial. Sit back and enjoy!
What we will be making:
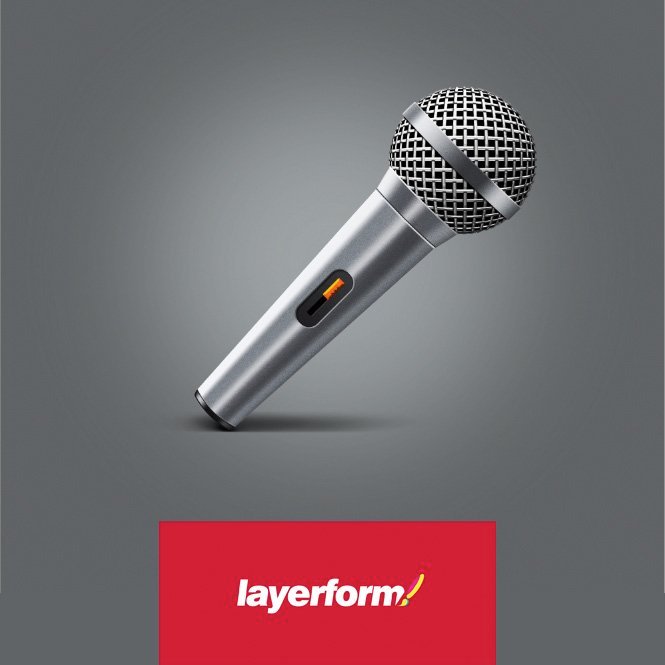
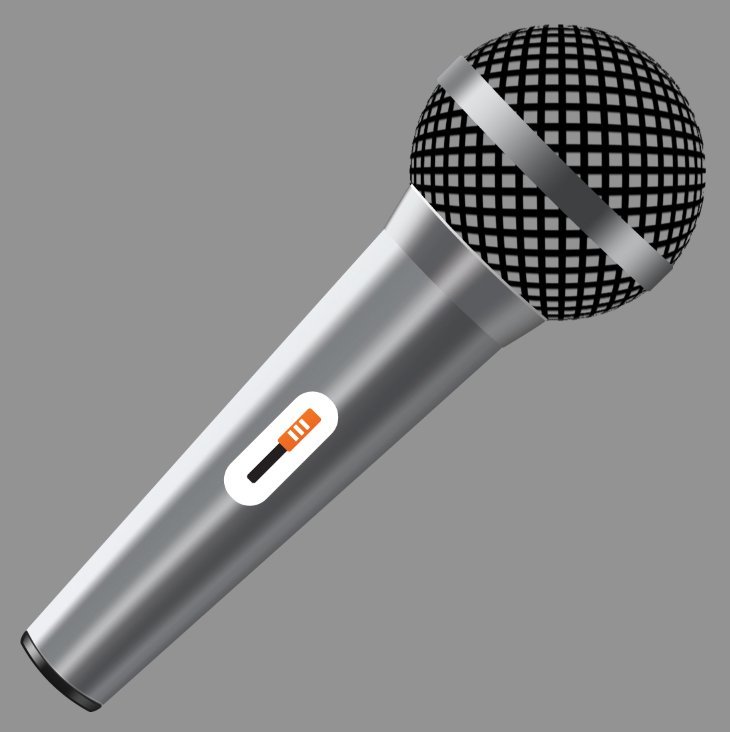
We will be creating this Icon in both Adobe Photoshop and Illustrator, so go ahead and open two documents, one in Photoshop, RGB at 2000px by 2000px, and then another in Adobe Illustrator. The shapes shall be made in Illustrator due to having a bit more flexibility in the program, and then it will be composited in Photoshop to add detail to the final icon.
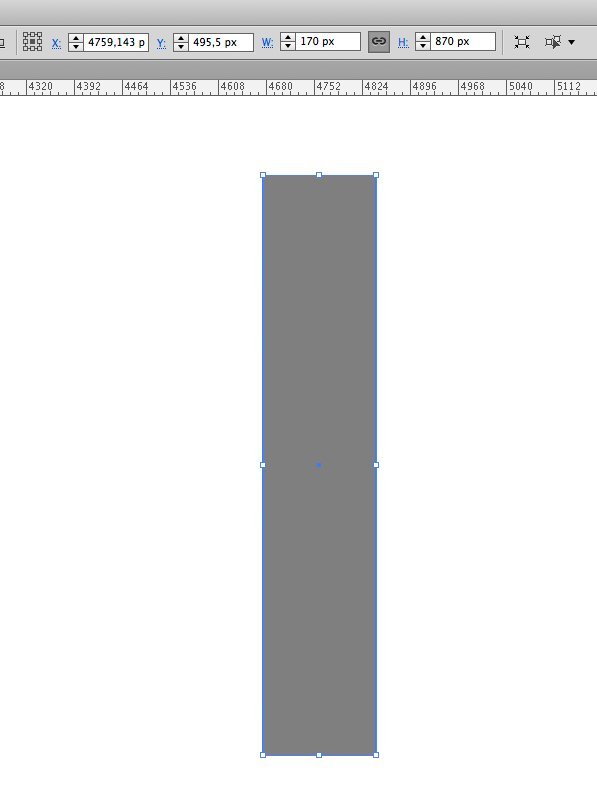
Step 1:
Jump into Illustrator and draw a rectangle, 170px x 870px
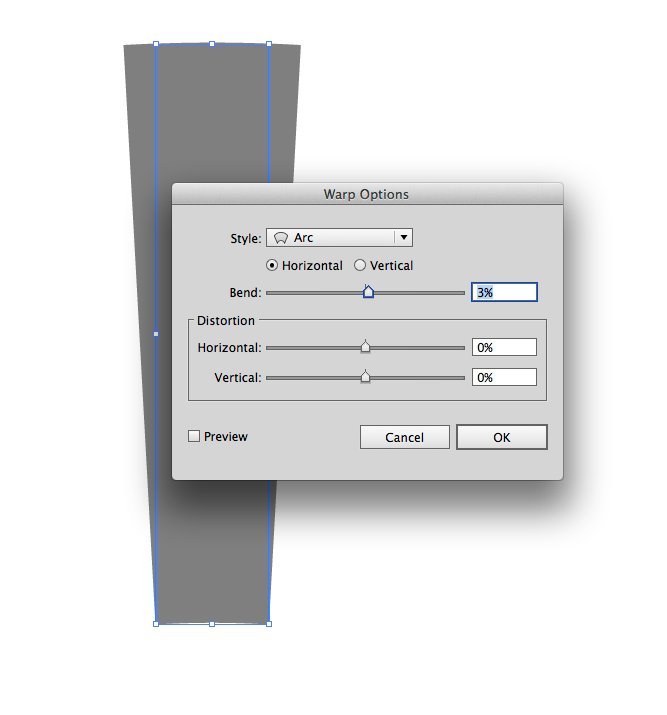
Step 2
Next, while the rectangle is selected go to Apply Effect -> Warp -> Arc. Bend = 3%. After this is done go to Object > Expand Appearance
Step 3
Go to Effect -> Warp -> Arc Lower with 50% Arc Applied.

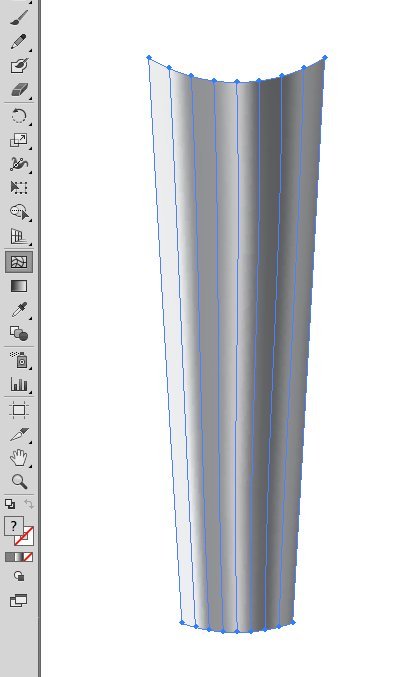
Step 4
Use Mesh Tool (U) to color the object. Use the colors like on the screenshot below by clicking and making separate vertical mesh points. Once this is done we need to copy our new shape in to Photoshop. Paste it as “Smart Object” – so you will be able to edit it easily.
Step 5
Go back in to Illustrator and Draw a new rectangle for the top portion of the microphone just below the Sphere. Apply Effect -> Warp -> Arc with Bend 14%. After that you should Expand Appearance of this object and go to the Effect -> Warp -> Arch with Bend: -20%

To make the switcher in the middle you should draw a rectangle with corner radius 25px. The size parameters of this rectangle is: 50×140 px – this will be outer field of the switcher. Go to Object -> Path -> Offset Path with -20px amount. It will be a black slit. Now we need to draw a wider but shorter button switcher with some short and thin lines applied to it.
Step 6
Piece together the various pieces of the microphone as illustrated below
Step 7
The round part of the microphone consists of about 20 rows, which you should duplicate and rotate on 90 degrees. Then apply Filter -> Distort -> Spherize to the both parts in Photoshop, as its on the image:

After this is done place the vertical lines layer ontop of the horizontal lines layer so you have something similar to this below:
Step 8
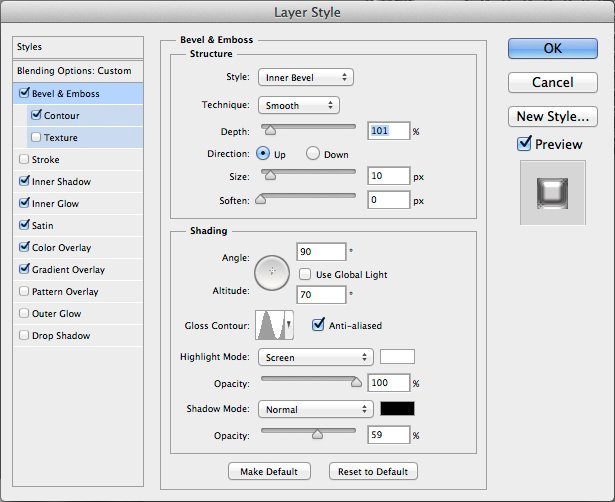
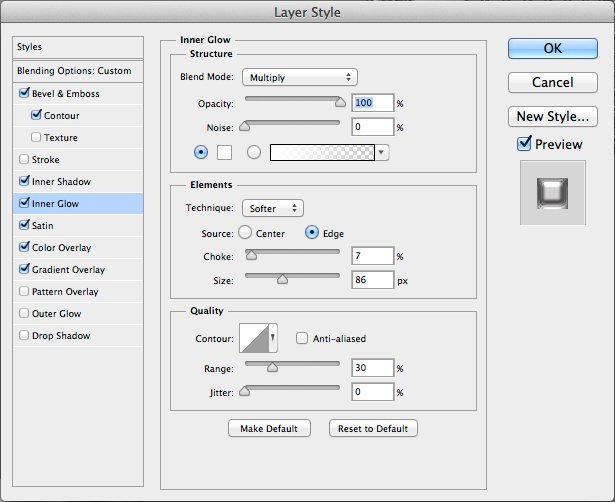
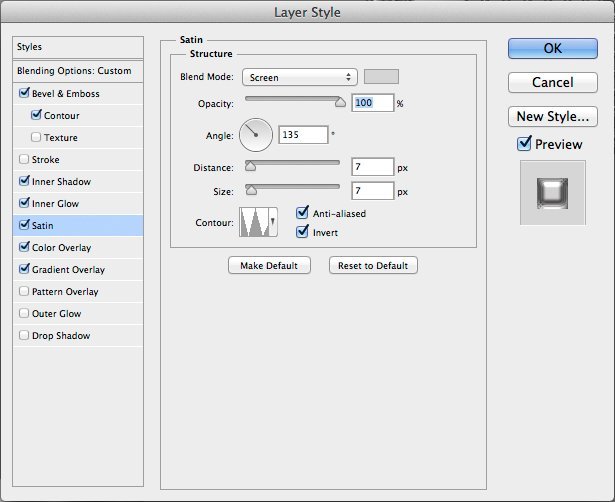
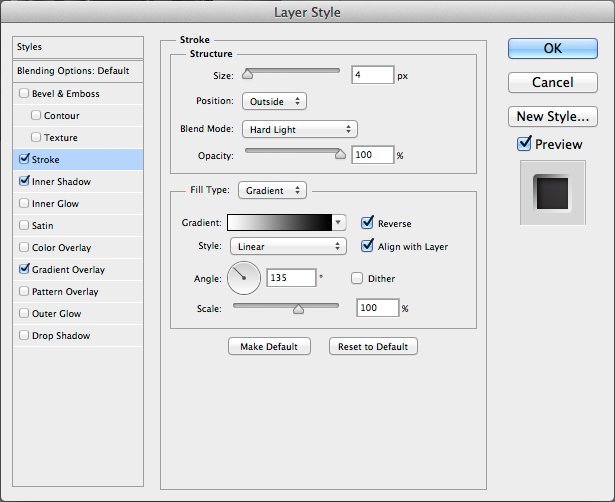
Grab the layer that your vertical lines are on and apply the following layer styles:


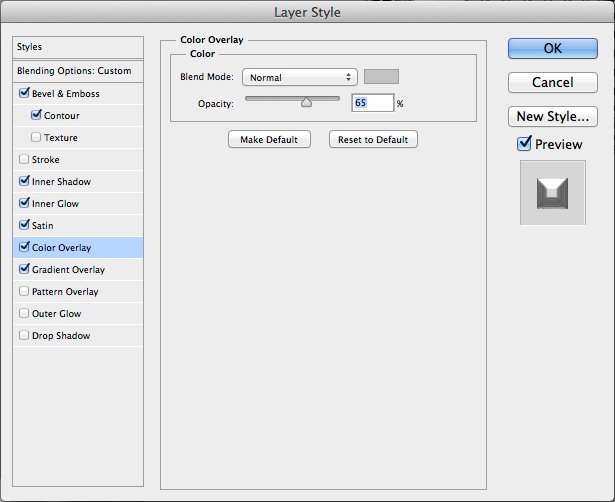

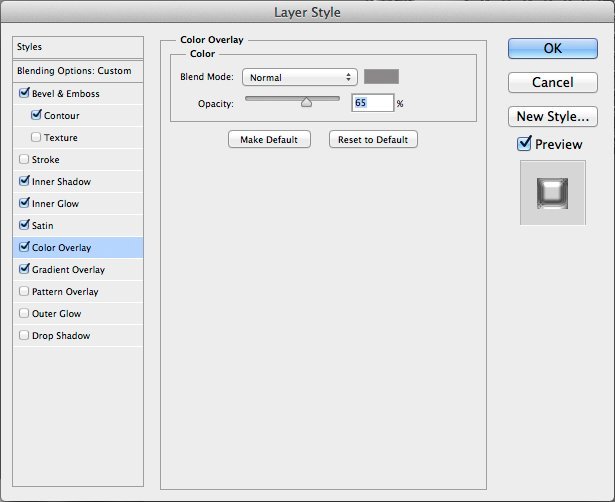
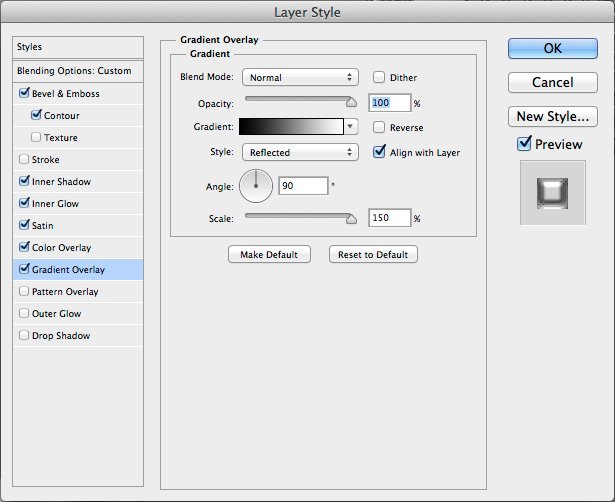
Step 9
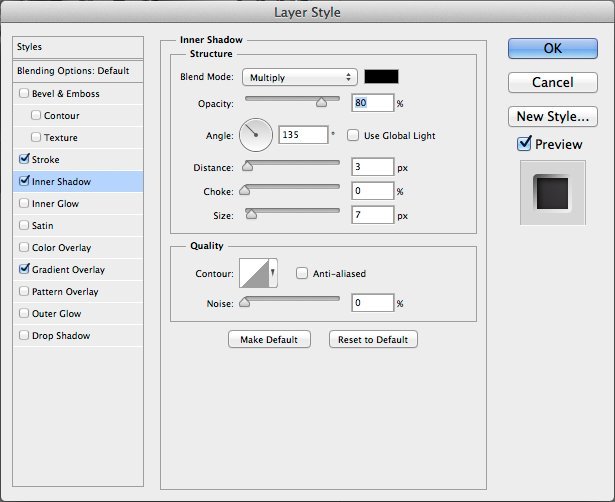
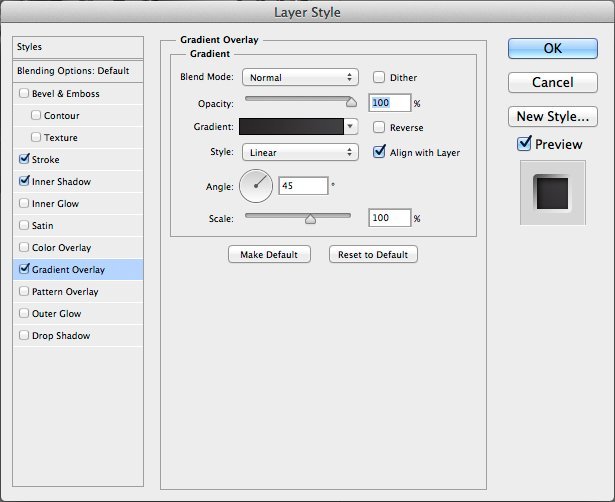
Grab the layer that your horizontal lines are on and apply the following layer styles:


Step 10
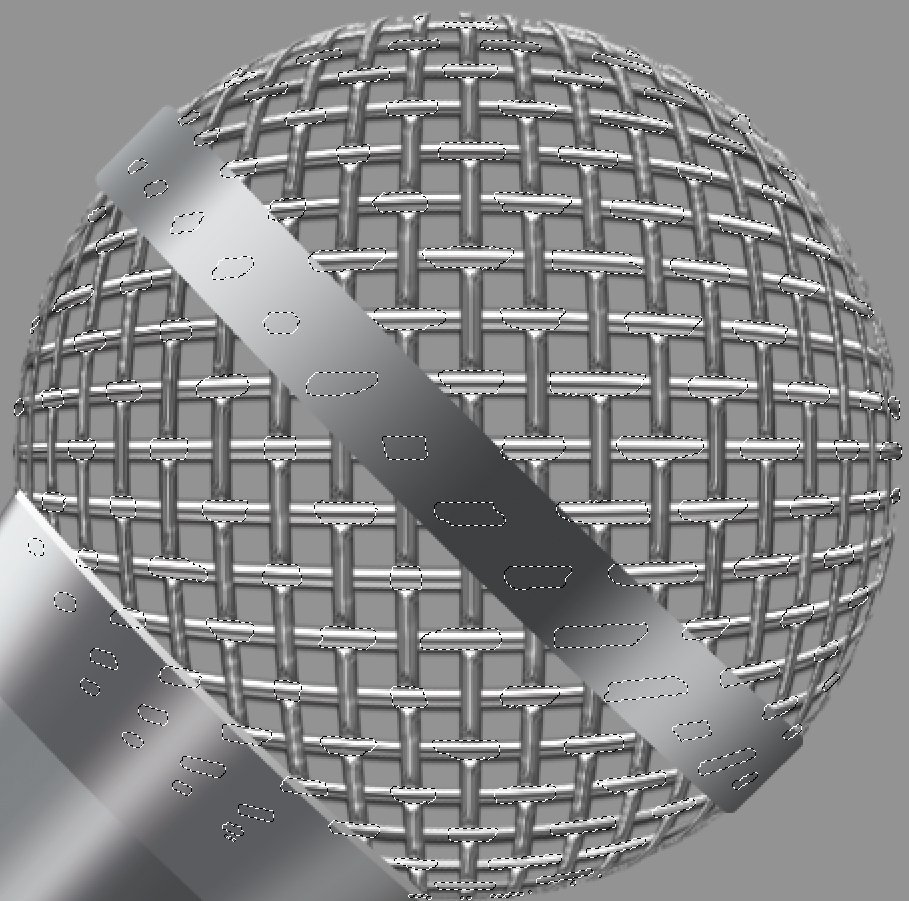
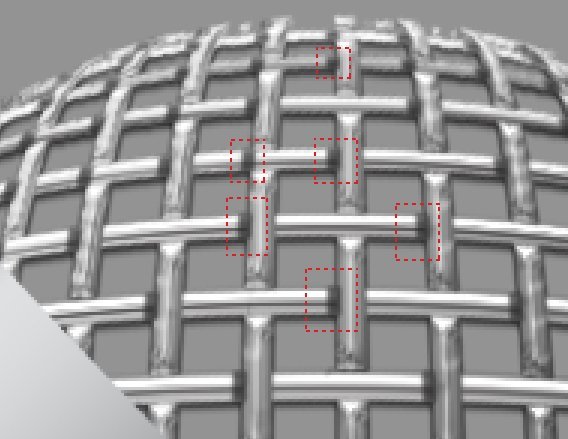
Add vector mask to the layer with vertical lines. Then make the selection by Ctrl + left mouse button click on the layer with horizontal lines. And on the vector mask of the layer with vertical lines draw lines like in a checkerboard pattern. The selection on the image below is what this should look like:
Step 11
Make the selection of the layers with vertical and horizontal spherized lines and on the new layer fill the selection. Apply Fill Opacity of this layer 0%. After this we need to apply a Gradient Overlay as its on the image below:

Step 12
We are going to shade the left hand side as can be seen in the image below:
Step 13
And now make the shades below the horizontal lines:

Step 14
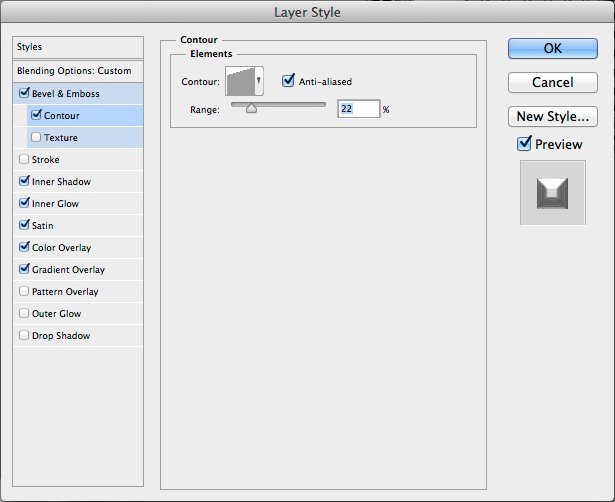
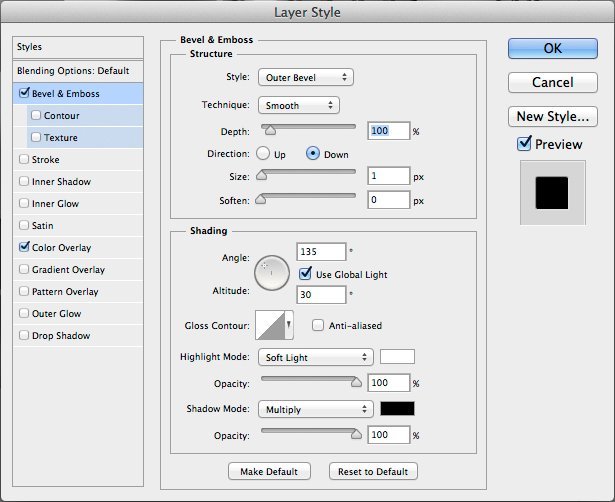
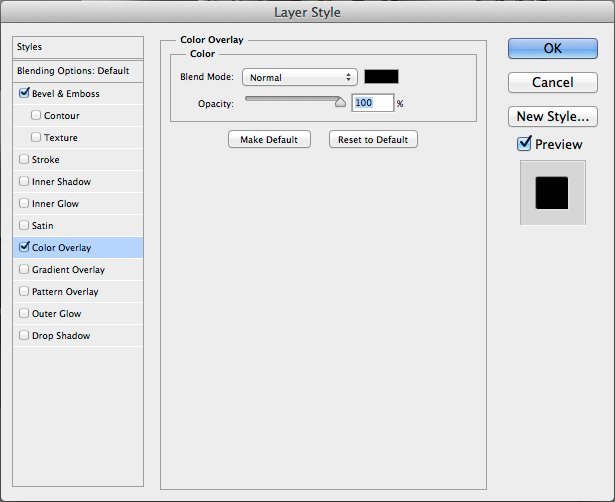
Make the selection of the layer with ring by Ctrl + left mouse button click. And then fill the selection with black color. Put this layer below the layer with ring – it will be its shade. Apply to this layer and go to Filter -> Blur -> Motion Blur with Angle 45 degrees and Distance about 10 px. Next we need to stylize the toggle switch. Apply to the layer with big rounded rectangular these parameters of layer style:
Step 15
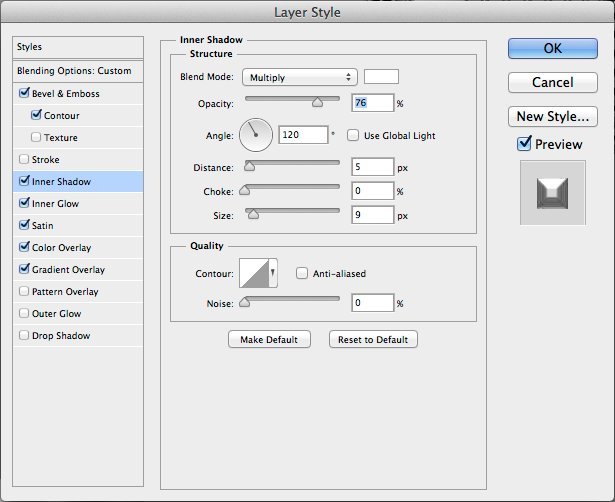
We need to locate the Layer with the thin line and apply these Layer Style Settings:
Step 16
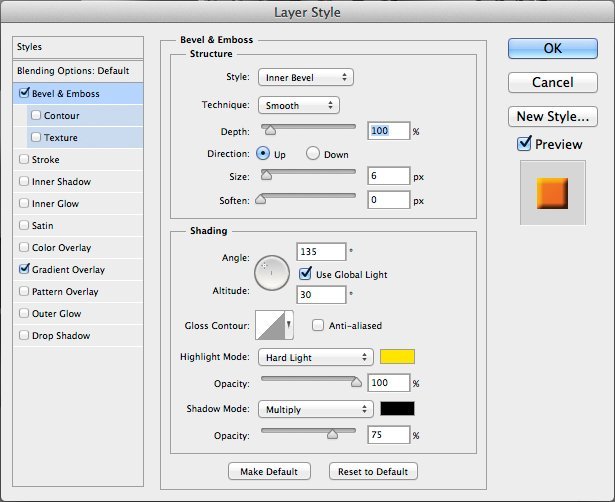
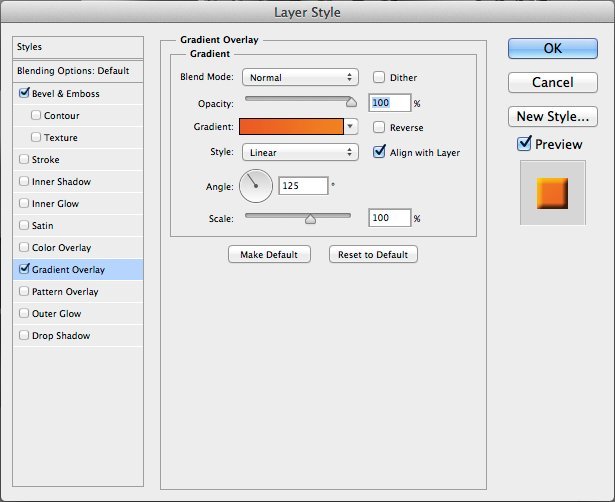
We now need to make the “switcher” (on/off switch) more realistic, so lets go ahead and apply the following layer styles to that:


Apply these Layer styles to the shape that has the small thin lines going across the switcher:
Step 17
Now we need to make shades and speculars on the handle. Use Ctrl + left mouse button click on the layer with handle and fill the selection on the new layer below. Move new layer 5-10 px to the right and top and fill this layer with light grey gradient. Repeat the steps with making the selection of the layer with handle, but move the new layer to left and bottom, fill this layer with grey and apply Bevel & Emboss layer style with Direction: Down.

Step 18
After this we need to make dark ellipse below the microphone’s grid. To make the shadow below the icon use on the new layer Elliptical Marquee Tool, Fill it with black and after that use Filter -> Blur -> Motion Blur with Angle 0 degrees and Distance 50 px as its on the image:
Make a darker shade like so:

Finito!
In my version I added noise on to the microphone itself to make it seem mor realistic and grainy, but if you would like a “sharper” or cleaner microphone then you can leave out the noise settings.
Author Details:

If you like this article then please check our our popular post entitled the Best Gifts for Designers which provides a solid list of Gifts, Gadgets and Present Ideas for Designers.
Leave a Reply
You must be logged in to post a comment.