
Contents
Learn to Make a Ribbon in Illustrator
In today’s tutorial we will go over how to create a ribbon in adobe illustrator from the beginning. Despite the simplicity of the final piece, we will cover advanced techniques using the pathfinder, how to manipulate the artboard in illustrator and also how to pick a complementary colour palette. So without further delay, lets get started!
Despite the fact that today you can achieve similar results from generating images in midjourney, then using an ai image upscaler to make money from your midjourney photos, this is still a great tutorial for those looking to get into generative ai, as very soon adobe generative ai will be releasing text to vector software.
This adobe tutorial can also be used on graphics tablets such as the Apple iPad Pro, Huion and Wacom devices too.
Step 1
Open up Illustrator and go to File > New then set the width to 640px and the height to 348px, press OK

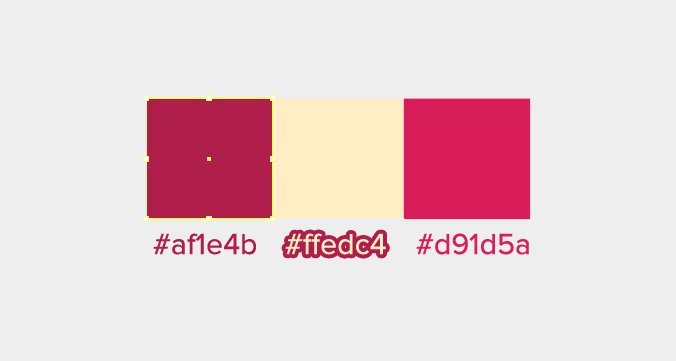
Next we need to pick our color palette, go ahead and create 3 rectangles by using the Rectangle Tool (Press M), click on each separately and fill them with a different color, the 3 colors we are using for this project can be seen below with their HEX Values. Click and drag over all 3 then press “Create Color Group”. This is essential to create a ribbon in adobe illustrator

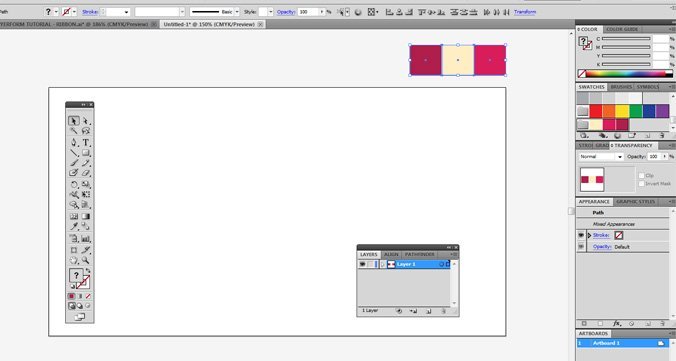
You should now have a canvas that looks something like this, with your swatches fully set and your rectangles on the artboard for easy color picking
Step 2
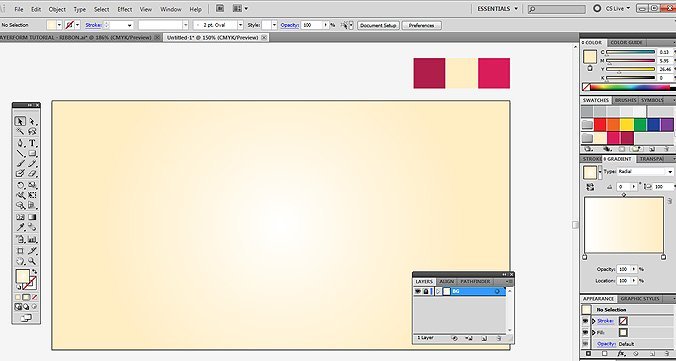
Press M for the rectangle tool, then click and drag until it fills your artboard from corner to corner. Then fill it with a radial gradient with#ffedc4 on the outside and #FFFFFF on the inside. Double click on the Layer and rename it “BG” then go ahead and lock the layer by clicking on the empty input next to the “eye” icon in your Layers palette (Windows > Layers)
Step 3 – Lets create that Ribbon Yo!
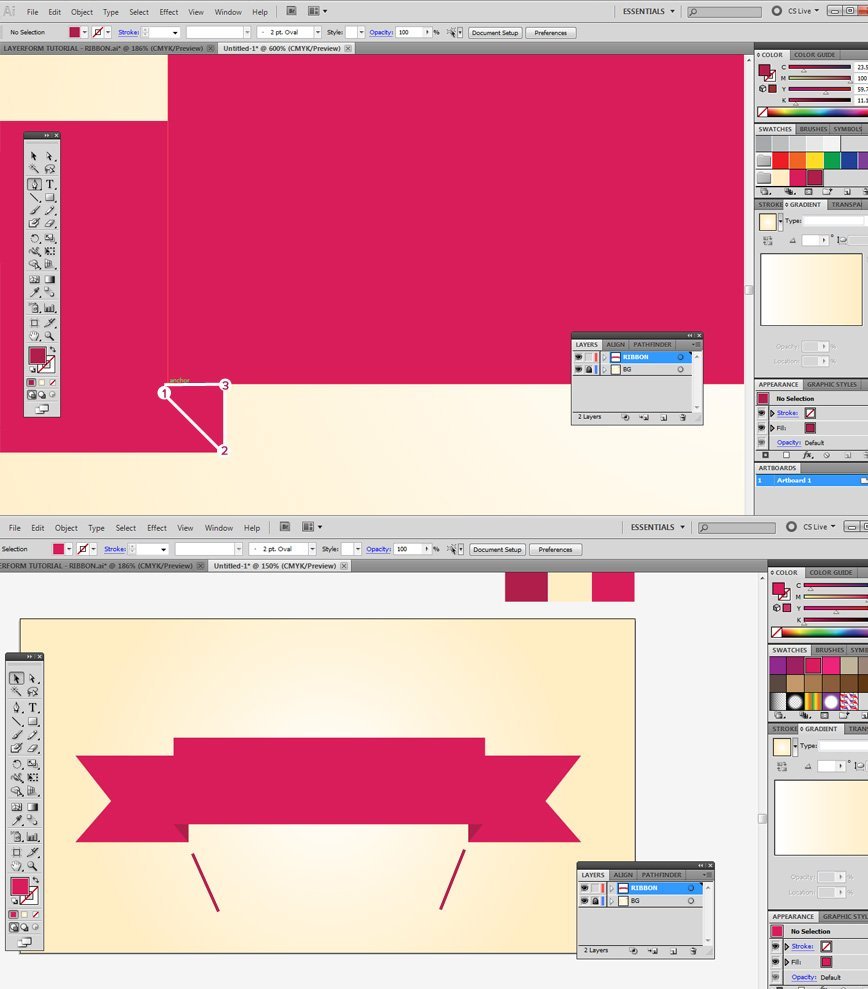
Create a new layer, then with the color #d91d5a selected in your foreground color, go ahead and use the Rectangle Tool to draw out a rectangle.

Next you need to draw out a narrower rectangle (but still the same height) using the same color, then press the “+” key on your keyboard and use the add anchor point tool to add an anchor point half way down the right side of the rectangle. Next press “A” and use to direct selection tool, click and hold on the anchor point while holding shift, then drag it inwards to create the ribbon edges. A crucial point if you want to create a ribbon in adobe illustrator

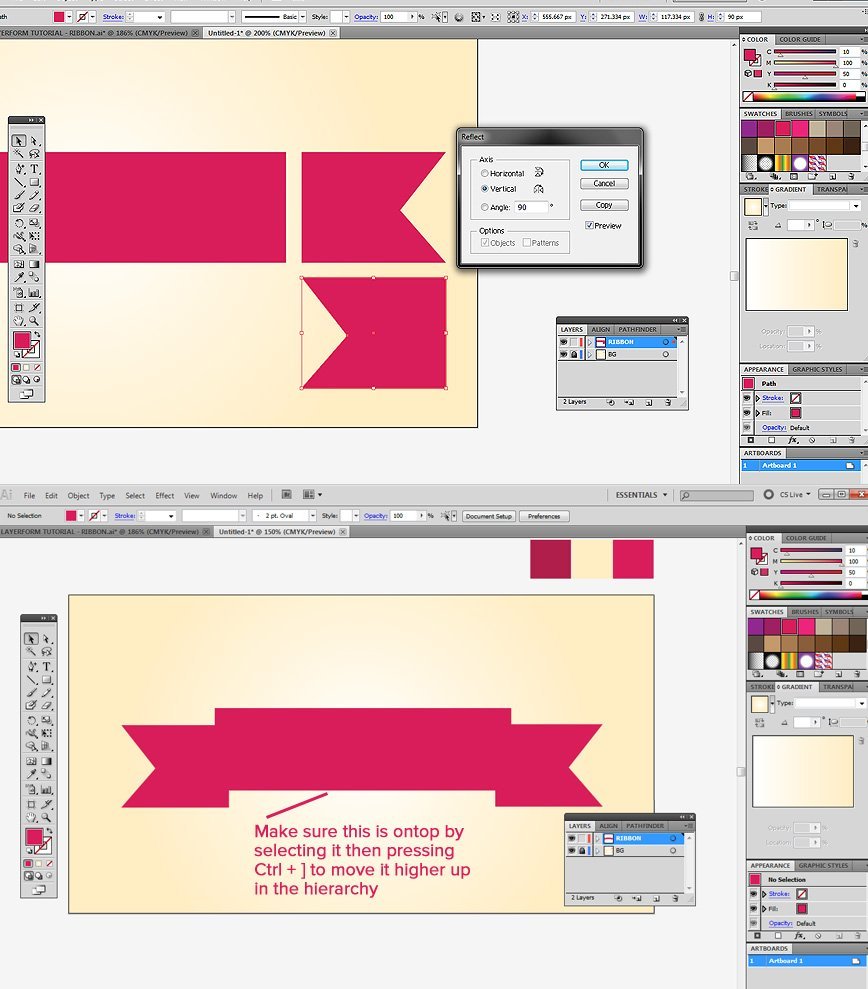
Next you need to click on this, hold alt and create a copy of what you just made then reverse it by going to Object > Transform > Reflect and using the following settings. After this is done move each ribbon end to either side of your original rectangle like below, then make sure your rectangle is ontop by selecting it and pressing “CTRL (or command) +]”
Step 4 – Linking the shapes & grouping
Ok so now we have our basic ribbon shape, we need to create the joining parts, aka: the “shadow” that creases behind, to do this select the color #af1e4b and using the Pen Tool (P), draw the following triangle over your existing shapes. After this is done select it, press Alt and drag to duplicate it, then go to Object > Transform > Reflect to reflect it and move it over to the other side similar to above ^
Step 5 – Shading & Text
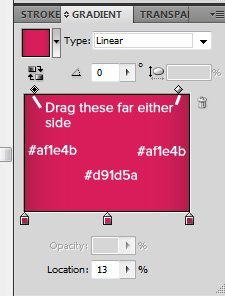
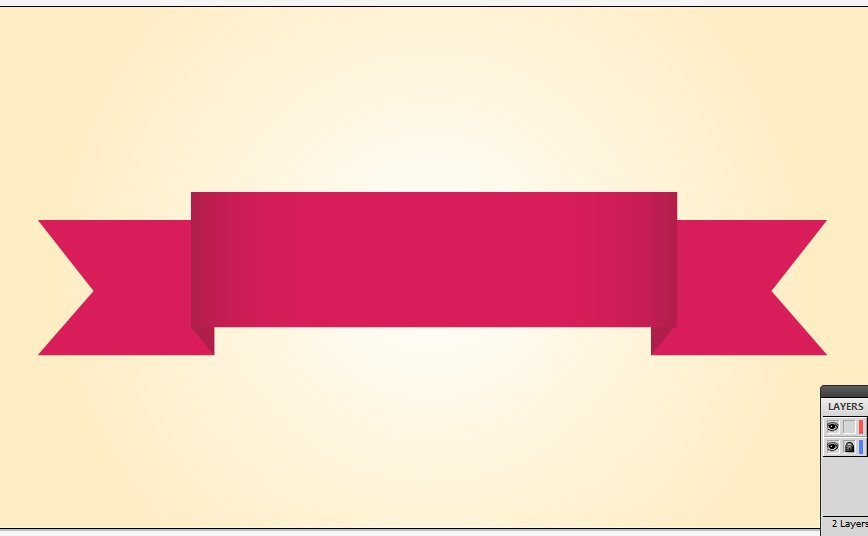
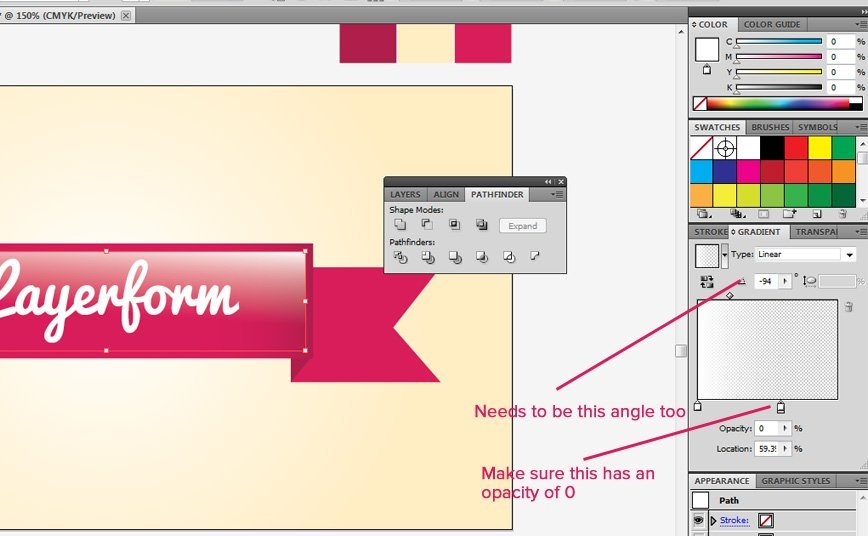
As you can see, the front side of the ribbon is blending into the left and right sides, we need to change this. Click on the rectangle we made originally with the Selection Tool (V), then click on gradients, we are applying a linear gradient similar to the screenshot below, in order to give some clarity between the shapes in our ribbon.
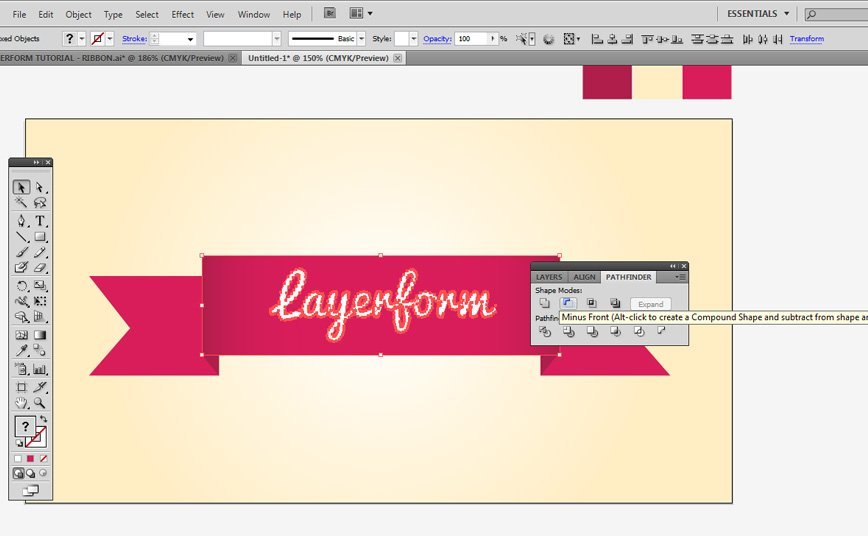
You will now have this:
Grab the Text Tool (T) and above your rectangle write out what you want, for the sake of this tutorial we are writing “Layerform” WOOOO! The font i have used is called Pacifico and can be downloaded here: http://www.dafont.com/pacifico.font
Next we are going to select the text and go to Object > Expand > OK to create paths instead of text so we can use the Pathfinder.

Step 6 – Pathfinder Magic
Bring up your pathfinder panel by going to Window > Pathfinder, then while holding SHIFT, click your text layer and your rectangle and press “Minus Front”. This will deduct our new shape, aka: Layerform Text, from the rectangle, so if you put an image underneath this layer, you will see it through the deducted Layerform text! MAGIC! 😀
Step 7 – Adding Highlights
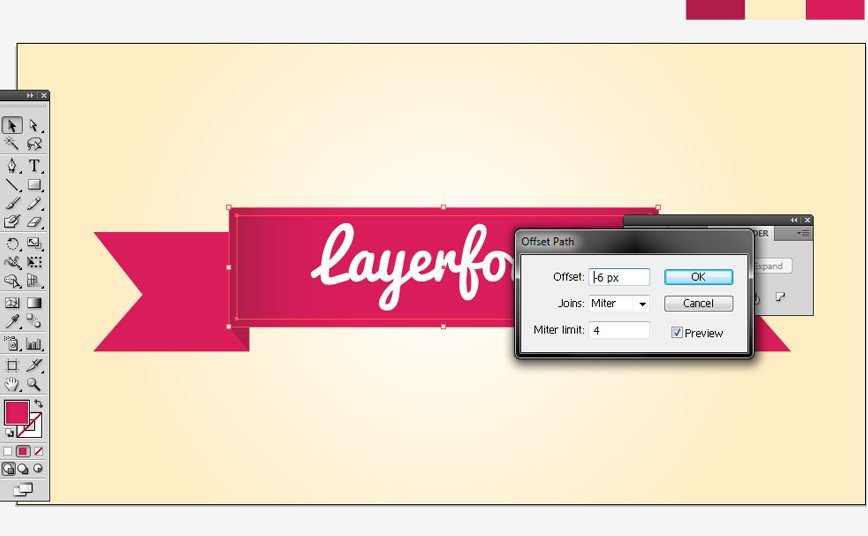
Just so that the ribbon doesnt look too flat we are going to add some highlights, to do this simply select your rectangle, then go to Object > Path > Offset Path and use the values below. Once this is done click on the new rectangle and give it a gradient in your gradients panel as seen in the second image below. Make sure both colors of the gradient are “white”. If you dont know how to use gradients, simply click your rectangle then drag colors from the swatch panel to the gradient points in the gradient panel:
After this is done go to your Transparency Panel and set the blending mode to Overlay, as on “normal” mode, the contrast is way too sharp.
Step 8 – Lets wave that shit homie!
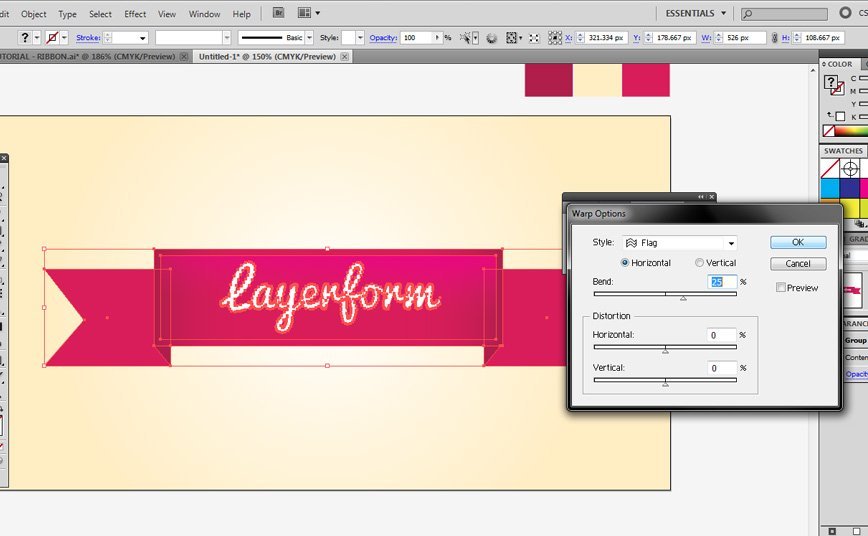
Almost finished! All we need to do now is select everything by clicking and dragging over our entire ribbon using the Selection Tool (A), then go to Object > Group. After this, click on your newly grouped object and go to Effect > Warp > Flag and use the following settings
The Finished Product:
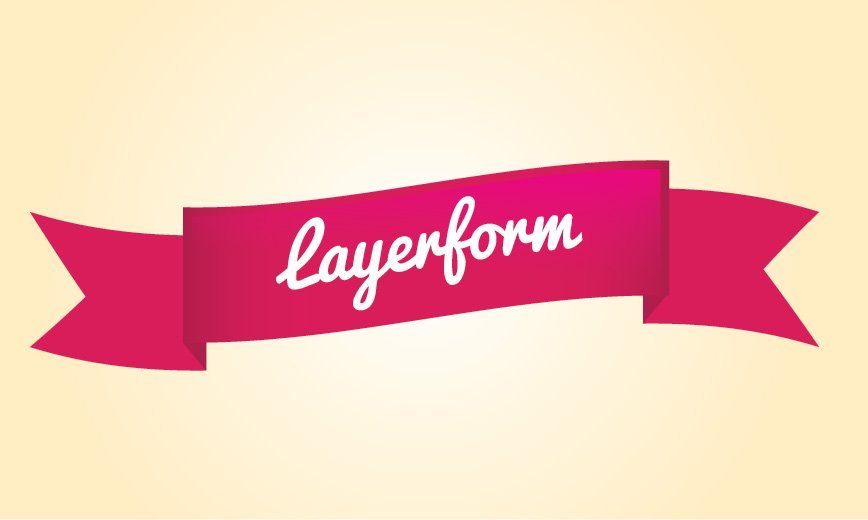
There we have it! You have learnt how to create a ribbon in adobe illustrator I hope you had fun during this tutorial and learnt something new, if not then i’ll try and do a better job next time! haha. Infact, I am going to be doing video tutorials from now on so be prepared for my refreshing blend of tutorials that will no doubt make you laugh, but also teach you vital techniques at the same time. Thanks again guys.
Leave a Reply
You must be logged in to post a comment.